
The Dogs of Africa, by Jackie Houchin
I’ve just returned from two weeks in Lilongwe, Malawi. Two things I’ve noticed in the four times I have been there is that many American families (teachers, missionaries, administrators) live in “compounds.” Many well-to-do Malawians do too.
These are large houses – really, amazingly so – inside large, high walled yards. Some of these enclosing brick walls sport coiled barbed wire or broken glass on top. All have solid metal sliding gates that are opened only by guards who work in shifts and only for residents and acknowledged visitors. And…. only after the DOGS are chained.
The transition from red-dusty, pot-holed roads to the lush garden interiors of these compounds is quite astonishing. So is the first sight of the…. huge, barking, slavering, jumping against chains, black guard dogs.
Malawi is known as “The Warm Heart of Africa,” and there has never been a war there. So why the over-the-top security? Poverty and hunger. Malawi is now officially the poorest country in the world.
But thank God, this year there was sufficient rain, The maize crop – their main food source – did well. Harvesting had begun in earnest while we were there.
But for the last number of years, many, many people in the villages went hungry. They see (or imagine) the things inside these fortresses as a means to feed themselves and their families. They steal to sell to buy food. Occasionally someone gets hurt if the residents are unexpectedly at home. The intruders’ greatest fear is not the guards, but the dogs. Big dogs. Black dogs. The color is important; they see them as especially evil and powerful.
 The first home our visiting short term missions team stayed at had Simba and Samson – father and son Great Dane/Rhodesian Ridgeback mix dogs. Their shoulders are at hip joint level. Their massive heads taller. Their shining fur, black as night.
Once inside the gate and approved by the owners, the dogs are really quite friendly to visitors and buffet each other to get the most petting. They run loose in the compound, and can be seen lazing about on the thick grass under flowering trees or Hibiscus bushes. But let a car toot at the gate, and they pound into action. The guard chains them to the wall near his shack at the gate before rolling it open.
My second Missionary Kids’ Story, titled Big Black Dogs, was inspired by these two beasts, with my made-up names of Gideon and Goliath. You can read the story here, (https://jackiehouchin.wordpress.com/2016/10/17/kids-stories-of-missionary-life-in-africa-2-big-black-dogs/ ) and marvel at their instinct for protection and their cunning ways.
This last trip, we stayed at another home (the family I patterned my MK Stories after). They have been in Malawi only since last summer, but one of the first things they did was to purchase two Great Dane-Shepherd mix pups; black, of course, and big.
 Their young children – fans of the Lord of the Rings series – named them Samwise and Frodo. They are only eleven months old and have some puppy ways, but let a horn sound at the gate and they are transformed into something like the Hound of the Baskervilles.
There is one other Big Black Dog that I have met in Malawi. He belongs to a family with three children, who hang on him and throw toys for him to fetch. Grown men who frequent the house are, however, quite fearful of him. I think it’s the eyes, because once a car enters the compound, he is quite silent. He watches, his tail never waging. A silent menace.
The family has a large Kondie – screened patio – at the back of the house where they entertain guests. It’s a great place (free of those pesky, dangerous mosquitoes) to talk while the chicken and beef sizzle on the grill.
Their Big Black Dog will appear silently as you relax and gab, and stare at you through the screen. You think that if you approach him all friendly-like and let him sniff your hand, all will be well. He’ll see you are no threat.
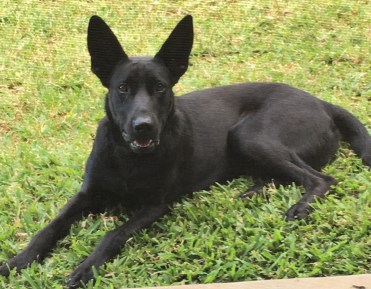 But as you rise and move toward him, a flimsy screen the only barrier separating you, and your eyes meet… he stands and growls deep in his throat and lifts a lip to show long canine teeth. His stiff-legged stance and erect tail warn of horrors to come should you venture closer.
You back away slowly and he stops. Eventually, as you sit down, he turns and resumes his guard duty around the house and other buildings. You notice sweat at your temples and armpits although it’s a fairly cool evening. Eventually your heart beat slows.
When it’s time to leave, the gate guard whistles for the Big Black Dog and secures him to the sturdy chain. Safe inside your car you drive slowly through the gate. “Killer” – as you have dubbed him – barks viciously and lunges against the chain as you pass. When you turn into the street and the metal gate rattles along the rail and bangs shut, the barking ends.
As the car moves away, you hear the young daughter of the family call the monster for a game of fetch. “Get it!” she shouts, and you hear nails scrape on cement. “Good boy, Sniff.”
Sniff??








 My fellow fish in the sea of writing, Writers In Residence in particular, have finished products that are enduring; books bound in soft or hard covers, given as gifts, re-read, treasured, shared among friends, and at the very least, end up on Friends of Library book shelves or even at yard sales at discounted prices to be bought and re-read again.
 About being the odd man (woman) out…I actually feel comfortable among my book writing and selling sisters. And if I can promote them, inspire them, write about them or their books, I will. (Look forward in the next months for some blog posts in which I feature these WWWs, or WIRs – you know, the talented, passionate, fun, interesting friends in our little lake of scribes.)

 Often, before diving into a scrumptious feast, the host of a Thanksgiving celebration will ask her guests to pause and answer this question.



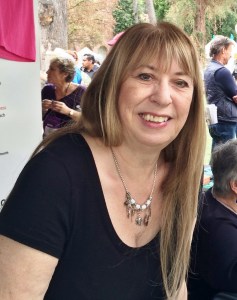 OUTSIDE THE LINES is sixth in the popular mystery series. Sheila Lowe has also written a stand-alone thriller in which her Handwriting Specialist appears in a minor role (What She Saw). Like her fictional character Claudia Rose, Lowe is a real-life forensic handwriting expert who testifies in court cases. She has begun work on the 7th book in the series, UNHOLY WRIT.
 Jackie Houchin is a Christian writer, book reviewer, and retired photojournalist. She writes articles and reviews on a variety of topics, and occasionally edits manuscripts. She also dabbles in short fiction. She enjoys creating Bible craft projects for kids; growing fruits, flowers, and veggies; and traveling to other countries. She also loves cats and kittens and mysteries.”
 This kind of free writing invigorates your thought process, sparks ideas that catch fire and burn down forests of paper!! (Sorry, I got a little carried away.)
 The other type of free writing that most wordsmiths don’t like to consider, is writing FOR FREE; not charging a fee, gratis, a lot of work for no pay. Some do it for the experience and to get a name and byline which they can later barter. They think of it as a rite of passage, paying their dues, a necessary evil. (Hey, I love clichés.)
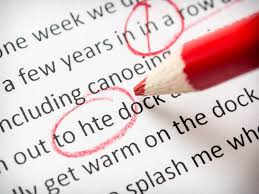 How about volunteering to critique or edit a friend’s manuscript? (I edit papers by seminary students in Africa and it is very gratifying.) Or mentoring a newbie writer? (I’m doing that for a friend who’s attempting her first memoir.) How about writing a note of encouragement to an author who’s just lost her editor or publisher, or gotten a stinky review?


You must be logged in to post a comment.